How to build a Syncthing MSI package for distribution #syncthing-msi

Long story short:

  • This topic should share my existing work on an MSI package which can be used, for example, to distribute Syncthing easily in Windows Domain Environments or to give friends an “easy to install and connect to your server” setup experience.

  • As I guess every Syncthing user has other demands when it comes to Syncthing’s configuration. For example, some users may like relaying and global discovery and others like to strictly use static IP connections or local site connections only. For that reason, I’ve put everything into BATCH files. If you need to “BUILD YOUR OWN”, just change the port numbers and/or xml setting lines in the batch to fit your needs :-).

  • The build script I’m personally using to bundle Syncthing into a MSI already “lives” for a long time. I’ve now decided to improve it to reproducibly build with “live-downloaded” packages instead of statically distributing my local set of build (portable EXE) tools. This should also head forward if later someone like to integrate the script into an official Syncthing build server.

I’ll now showcase where to find the MSI build script and how to use it.

References:

HOW-TO: Build your OWN Syncthing MSI package

  1. Head to my batch repo at https://github.com/Catfriend1/syncthing-msi/releases/tag/v1.4.0 and download the GIT workspace from https://github.com/Catfriend1/syncthing-msi/archive/v1.4.0.zip .

  2. Extract the downloaded “syncthing-msi-1.4.0.zip” to “C:\Temp”. image image

  3. The folder “C:\Temp\syncthing-msi-v1.4.0” will open after extraction. image

  4. Double-click to launch “wix_build_msi.cmd”. The script will download portable prerequisites like GNU sed, Non-sucking-service-manager, Microsoft Sigcheck64, Syncthing and WiX Toolset. It will then build the MSI package using the latest Syncthing win-amd64 version - at time of writing v1.4.0. image

  5. Close the build output console window and look at your “C:\Temp\syncthing-msi” folder. Notice the file “Syncthing_v1.4.0.msi” was created. image

Done, your MSI package is ready for interactive installation or domain deployment via group policy.

HOW-TO: Install the Syncthing MSI package for ALL users running with “root” permissions. In Windows we call this permission level a “SYSTEM” service.

WARNING: You should FIRST consider how you secure Syncthing’s Web UI interface before deploying the package to corporate clients. With Syncthing’s default setting, the Web UI is reachable from localhost only (http://127.0.0.1:8384) and has NO password set until YOU set one. So be warned.

TIP: I recommend to install the MSI package on a virtual machine if this is your first try. So you can first see if it fits your needs or if you require editing the default Syncthing settings in the BATCH script.

  1. We’ve already built “Syncthing_v1.4.0.msi” during the how-to above. Let’s double click it to install it. image

  2. The installer may ask for administrative permission to setup the Windows service called “Syncthing” and an incoming firewall rule to get you starting. image

  3. Continue and wait until the installation completed. image

After setup is complete, the Syncthing service should be running. You could verify that - optionally - by looking in Windows services from the Control Panel.

  1. Open Windows start menu and look for “Syncthing Web UI” to setup a password for your locally installed Syncthing instance.

image

Go to “Actions” > “Settings”, flip the tab to “GUI” and fill in the password for the Admin UI. Then, hit “Save”.

image

You can now start to configure your Syncthing instance to your needs - just as you would do it with every common Syncthing instance.

==============

For reference: The MSI package currently modifies the following parts on your disk and Windows control panel:

  1. Installation folder is created

image

This is where your Syncthing binary files and database reside. You could technically upgrade the Syncthing instance, but currently it’s disabled by the MSI package as I personally like to upgrade our corporate environment with a new MSI package instead to equally determine the time when the upgrade arrives.

  1. Windows service is created so Syncthing starts delayed ~ 2 minutes after boot

  1. Firewall rule is created to allow local discovery and incoming connections for “syncthing.exe”

HOW-TO: How to easily connect family members or friends to your Syncthing server using a DynDNS address (with port forwarding set up).

  1. You already have “Syncthing_v1.4.0.msi” in your hands.

  2. Rename the file according to this scheme:

Syncthing_v1.4.0__[SYNCTHING_SERVER_DEVICE_ID]+[SYNCTHING_SERVER_DYNDNS]+[SYNCTHING_SERVER_TCP_PORT].msi

Example:

  • My Syncthing server is hosted at “catfriend-home.dyndns.org
  • The tcp port is configured to the default port number 22000.
  • The server’s Syncthing device ID is “CF6WMOG-F4RHVKW-2FTJONJ-GJ3FZQS-YW5TJVW-VDDT6ZQ-EVJ2WDP-RL4QZQO”.

Resulting filename:

Syncthing_v1.4.0__CF6WMOG-F4RHVKW-2FTJONJ-GJ3FZQS-YW5TJVW-VDDT6ZQ-EVJ2WDP-RL4QZQO+catfriend-home.dyndns.org+22000.msi
  1. Run a test MSI installation on a virtual machine or from a PC outside your local network.

image

  1. Open “Syncthing Web UI” from Windows start menu to see if it worked correctly.

image

image

You now see that the MSI installer automatically added your Syncthing server to the “Remove Devices”. This will cause to dial out to your server, so you just need to accept the requests coming from your friends/family computers there. If you share some folder with them, they’ll get the common Syncthing popup message on the Web UI which asks them to accept or ignore the folder. If they decide to add the folder, they’re automatically suggested to put it in “C:\Server\Sync”.

image

I’m currently on the trip to make my MSI to install Syncthing as a service better. If there’s interest, when I reach the point where I require less third-party utitilies and have configurable flags, e.g. for ports and connections we could get together in a discussion if there’s a chance of official MSI bundling. I still need to rework the setup process to be only dependent on the official syncthing.exe+nssm+batch. I also consider giving special protection to the folder where Syncthing places its secret keys and config. In my first draft, every normal user without admin priv could read the key files. Changing the port through the web ui made the link to it on the start menu invalid. I’ll report back when I’ve improved at that points.

3 Likes

… and here’s the “second gen” MSI where I think I’ve successfully improved a lot of things in regard to packaging Syncthing.

Link: https://github.com/Catfriend1/syncthing-msi/releases/tag/v1.5.0

Two highlights in summary:

  1. The package got a new strategy of “Do your own Syncthing”. It bundles the official “Syncthing.exe” keeping as much of the “config.xml” maintain-able from an admin perspective. You can one-shot-apply your preferred “config.xml” settings or force certain settings on every upgrade that is enrolled using the MSI package (override mode). Double-clicking or GPO-deploying the MSI uses default settings (see below). You can customize by using MSI command-line switches or using the free tool “Microsoft Orca” to edit the MSI properties so you have your “own package” in the end.

image

In Orca, go to “Property” on the left side of the window and then edit the properties according to your preference.

Example:

*** SECURITY NOTICE ***

Do NOT set REMOTE_WEB_UI without ensuring you’ll also set up a Web UI password immediately after deployment, e.g. through your own batch script. With Syncthing’s default, it would leave the web UI open with no password to every machine on your network and/or internet.

  1. The Syncthing service is now pre-configured to run under the “LocalService” account which improves security by avoiding to give it the “full” SYSTEM account access. It can access the default path “C:\Server\Sync” without any need to manually adjust ACL on folders with Windows Explorer. The C: drive also works in regard to add a new folder “C:\my-synced-docs” if your system is a common Windows installation. For sensitive paths like C:\Windows[subfolder], C:\Users[subfolder] the admin/user has to explicitly add “LocalService” to the folder’s permission set to allow access.

Changelog:

  • Replaced third-party tool “sed.exe” by “psreplace.cmd” using PowerShell
  • Removed build dependency “sigcheck.exe”, it was replaced by PowerShell
  • Added helper script “syncthing_grant_folder_access.cmd”
  • Added helper scripts to force a database recheck on next service startup “Create syncthing_strecheckdbevery_{off|on}.cmd”
  • Added auto-detection of Syncthing’s web UI port to open the correct URL in the browser in case the user changed the port after the initial installation.
  • Hardening and security have been improved. The “Syncthing” service is now configured to run under the “LocalService” account (instead of “NT AUTHORITY\SYSTEM”). Additionally, Syncthing’s home directory (C:\Server\Syncthing\appdata) can only be accessed by the following built-in security principals: “NT AUTHORITY\NETWORK SERVICE”, “NT AUTHORITY\LOCAL SERVICE”, “Built-In\Administrators”. This helps to prevent non-admin users on the same machine “leaking” Syncthing’s secure device keys and API key from the config.
  • Added MSI properties to “do your own Syncthing”, offering ability to use MSI command line switches for personalization and being to able to create MSI Transforms (.MST) with MS Orca.

Valid switches for the MSI / Transform are:

		<!-- App specific properties -->
		<!-- Leave ADD_DEVICE_HOST at the pre-defined value if you do not need to enroll a new device -->
		<Property Id='ADD_DEVICE_HOST' Value='localhost.localdomain' />
		<Property Id='ADD_DEVICE_ID' Value='CF6WMOG-F4RHVKW-2FTJONJ-GJ3FZQS-YW5TJVW-VDDT6ZQ-EVJ2WDP-RL4QZQO' />
		<Property Id='ADD_DEVICE_PORT' Value='22000' />
		<Property Id='crashReportingEnabled' Value='false' />
		<Property Id='DATA_PORT' Value='22000' />
		<Property Id='globalAnnounceEnabled' Value='true' />
		<Property Id='hashers' Value='0' />
		<Property Id='localAnnounceEnabled' Value='true' />
		<Property Id='natEnabled' Value='true' />
		<Property Id='OVERRIDE_DEVICE_NAME_WITH_COMPUTERNAME' Value='1' />
		<Property Id='OVERRIDE_EXISTING_CONFIG' Value='0' />
		<Property Id='relaysEnabled' Value='true' />
		<Property Id='REMOTE_WEB_UI' Value='0' />
		<!-- SERVICE_ACCOUNT options: LOCALSERVICE, NETWORKSERVICE, SYSTEM -->
		<Property Id='SERVICE_ACCOUNT' Value='LOCALSERVICE' />
		<Property Id='STNOUPGRADE' Value='1' />
		<Property Id='urAccepted' Value='-1' />
		<Property Id='WEB_UI_PORT' Value='8384' />
2 Likes

Neat

1 Like

thanks for sharing, I’m sure many admins will find this helpful!

1 Like

I think the build scripts for the MSI are “stable” or better say reliable now. The v1.5.0 of the do-your-own recipe works as well for v1.8.0. I’ve just fixed a little glitch preventing Syncthing from in-place auto upgrade itself if the user chose so. Cause was the NSSM service wrapper stopped the service process tree as soon as the monitoring process exited and Syncthing went dead instead of restarting after carrying out a successful update. I’ve fixed it by creating a small batch script that looks at the exit code and handles shutdown and restarts accordingly.

The new DYO recipe is now at https://github.com/Catfriend1/syncthing-msi/releases/tag/v1.8.0 .

Starting Syncthing under Windows I has so far been done by the task planner. However, this does not always work perfectly. It rarely happens that Syncthing does not start and after a long period of running of the computer it could happen that Syncthing no longer ran. This happened repeatedly, especially after an energy-saving mode.

The MSI package is therefore installed on my Windows computers. It has been running perfectly so far. In addition, a service is stored that can be stopped and adjusted. “Local service” is stored by default as the user account, and directory rights are to be assigned to this user.

In my case, I saved the user account as in the task planner and took over the AppData completely from the previous installaion. After the service starts, Syncthing run as before.

Also good work that MSI!

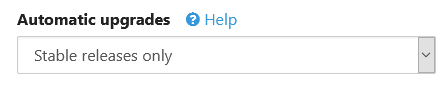
However, that means with the MSI package, as with the SPK package for Synology, that any new updated MSI must be installed when the version changes, since updates are no longer permitted via the GUI. But it means also, that the installation of RCs is officially not possible. I think in the whole it’s a clean solution.

1 Like

Hi,

thanks for your feedback on this. The MSI also has a property where you can set if you’d like to allow automatic or rc upgrades. It sets STNOUPGRADE or removes it accordingly. you can for example use MS Orca to edit the MSI or adjust the defaults in the wxs build script.

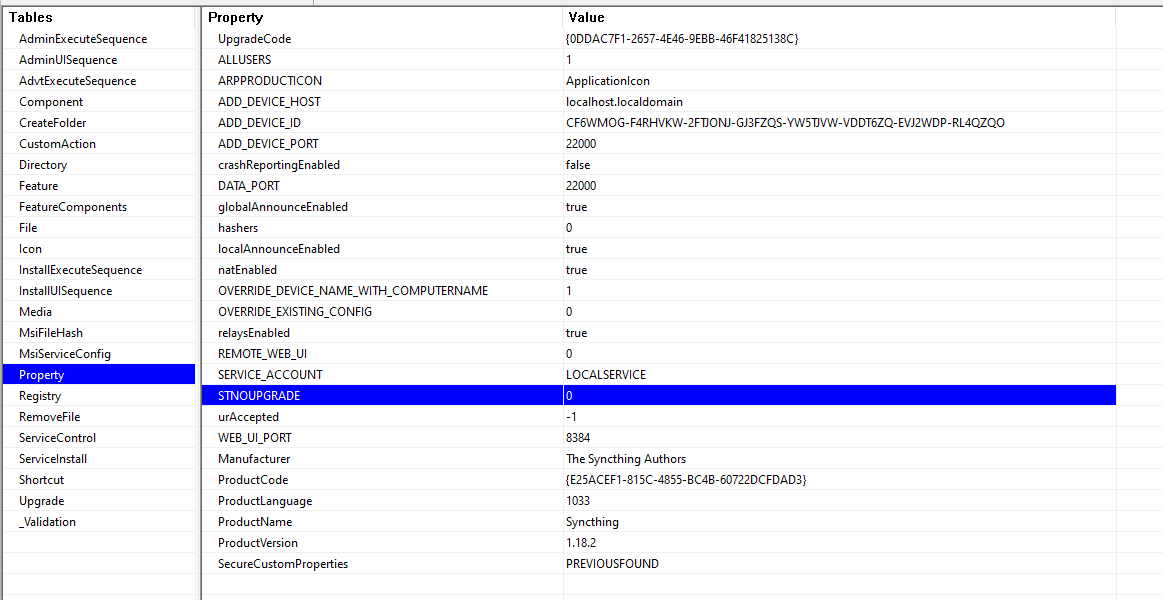
I made this modifikation with Orca and remove in the MSI the rows about STNOUPGRADE in property and registry and try a very new installation, but without effect.

Until others I use the MSIs for updating.

I remember it was setting

<Property Id='STNOUPGRADE' Value='0' />

instead of removing it. Removing might cause the script to log an error.

With the same effect:

grafik

In the MSI is now:

grafik

Registry shows as follow:

But the result is the same as in picture one, if I remove the entrance complete or if STNOUPGRADE is 1, no change.

After repeating the installation and using the old database, I used up to the MSI package, it runs now …

grafik

So it seems, there is also a database entrance about that, which is no good solution, if a change is needed after a installation.

1 Like

What is the behavior when updating via an MSI package? Is it safe to simply install the new MSI over the current installation without losts or other modifications?

Yes, you can install a new MSI over an existing installation. If you had special settings in your first installation MSI, they are preserved. If you’d like to edit the upgrade MSI containing new properties, an uninstall and reinstall is required to get them applied. You can see this Windows installer behaviour when looking at the registry entries you’ve already discovered. They only get populated by the MSI package contents on first install and then no more.

I use the MSI params for example to auto-add our company server as a one shot config action on first install. If I then push out upgrades of the package, the config remains - so all devices that got the package can be upgraded via domain gpo and there is no reconfiguration necessary.

For pro’s, I’d recommend putting the customized properties into MST transform file and install via mst+msi. This ensures the MSI need not be altered and you never forget to set a property when deploying a new package.

I dont know about that.

The installation of the MSI with standard parameters the auto upgrade is not possible. It was not possible to change back, if needed, also after modification of the Registry. Also after Deinstallation without deleting of the settings and database and new Installation of MSI with the modified MSI package there was no change.

In which way I change such parameters (activate auto upgrade) after the installation?

In my case this was only possible to set with the modified MSI package and a very green installation.

I’ll make a test in a few days and document the steps for you then. Think this is better than answering from memory. Altering the registry is not working because the script reading the values is not re-run and bare Syncthing only looks at config.xml and STNOUPGRADE. So basically, removing the STNOUPGRADE env in Windows Control Panel and restoring the AutoUpgradeIntervalH, ReleasesUrl is a way to manually resolve it.

Ok, let’s make a try. I’m starting out with ( https://github.com/Catfriend1/syncthing-msi/releases/download/v1.12.1/Syncthing_v1.12.1.msi ) and just installing it as is.

As you got it right, the default in the MSI package is “no upgrades”. You also see this when the console pops up during installation, it got to set the STNOUPGRADE env var.

Now let’s check in Syncthing’s Web UI - it’s reflected as expected.

image

I’ll install Orca now and edit the MSI, from

to: image

and install that MSI over the existing installation.

STNOUPGRADE is still perceived as “1”, because Windows Installer does not update it when a package is performing the APP_UPGRADE process. This is expected from my side (unless someone can give me a hint how to change this MSI default upgrade behaviour in the WXS script).

I’ll now uninstall the Syncthing package. Then go for a reinstall and get:

My Syncthing Log on the Web UI greets me with:

and image

So this works pretty well for me.

Please note: You do not need to backup/restore your C:/Server/Syncthing/AppData “config” folder. If you uninstall the package, your config will be preserved (to be later reused on reinstallation) and only binaries will be deleted.

image

Kind regards, Catfriend1

1 Like